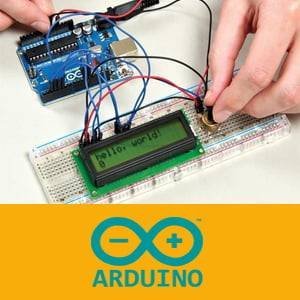
Learning Arduino coding for beginners can start with understanding the program structure, recognizing input and output, then trying basic projects such as blinking an LED, reading a button, reading a light sensor, and using the Serial Monitor. Based on the information provided, Arduino is suitable for beginners because the code you write can be directly seen in action on a physical device.
What Is Arduino?
Arduino is an electronic board that can be programmed to read input and produce output. The inputs Arduino can read include buttons, light sensors, temperature sensors, distance sensors, and potentiometers. Meanwhile, the outputs Arduino can control include LEDs, buzzers, motors, servos, relays, and LCD displays.
Because it can read data from sensors and control electronic components, Arduino is often used to create basic projects. Examples include automatic lights when a room gets dark, automatic trash bins, door alarms, automatic plant watering systems, room temperature monitoring, and light control using sensors or applications.
Basic Tools for Learning Arduino
Before starting to code, beginners need to prepare several basic tools. Based on the information provided, the tools needed include an Arduino Uno or compatible board, USB cable, laptop or computer, Arduino IDE, breadboard, jumper wires, LED, 220Ω or 330Ω resistor, push button, and basic sensors such as LDR or DHT11.
Why Is Arduino Uno Suitable for Beginners?
Arduino Uno is one of the most commonly used boards for beginners. The reason is that, based on the information provided, Arduino Uno has many tutorials, code examples, and components that are easy to find in Indonesia.
This makes it easier for beginners to find learning references or try their first project. Arduino Uno is also suitable for understanding the basics of input, output, sensors, and programming logic.
How to Use Arduino IDE
Arduino IDE is an application used to write and upload code to an Arduino board. The first step is to download Arduino IDE from the official Arduino website, install it on a laptop or computer, then connect the Arduino board using a USB cable.
After the Arduino is connected, open Arduino IDE, select the Arduino Uno board, choose the correct port, write the code, then click the upload button. This process is the foundation before running a program on the Arduino board.
Basic Structure of an Arduino Program
Every Arduino program generally has two main parts: setup() and loop().
void setup() {
  // Code here runs once when Arduino starts
}

void loop() {
  // Code here runs repeatedly
}
The setup() function is used for initial configuration, such as setting a pin as input or output. Meanwhile, loop() is used to run commands continuously as long as Arduino is powered on.
Blinking LED Program Example
The first common exercise when learning Arduino is making an LED blink. In this example, pin 13 is used as the output.
void setup() {
  pinMode(13, OUTPUT);
}

void loop() {
  digitalWrite(13, HIGH);
  delay(1000);

  digitalWrite(13, LOW);
  delay(1000);
}
The command pinMode(13, OUTPUT); means pin number 13 is used as an output. The command digitalWrite(13, HIGH); turns the LED on, while digitalWrite(13, LOW); turns the LED off.
The command delay(1000); gives a delay of 1000 milliseconds or 1 second. So, the LED will turn on for 1 second, turn off for 1 second, then repeat the same pattern.
Understanding Digital and Analog Pins
Arduino has two types of pins that are often used when learning the basics: digital pins and analog pins. Both have different functions, so it is important to understand how each one is used.
Digital Pins for ON and OFF Signals
Digital pins are used to read or send ON and OFF signals. Based on the information provided, digital pins are commonly used for components such as LEDs, buttons, buzzers, and relays.
Example of digital commands:
digitalWrite(13, HIGH);
digitalWrite(13, LOW);
HIGH means the pin is active or on, while LOW means the pin is off.
Analog Pins for Reading Sensor Values
Analog pins are used to read changing sensor values. Examples include light sensors, potentiometers, humidity sensors, and sound sensors.
int sensorValue = analogRead(A0);
Based on the information provided, Arduino analog values usually range from 0 to 1023. This value helps Arduino read changes from sensors in more detail.
Reading a Button with Arduino
Arduino can also read the condition of a button. In the following example, the LED will turn on when the button is pressed.
int button = 2;
int led = 13;

void setup() {
  pinMode(button, INPUT);
  pinMode(led, OUTPUT);
}

void loop() {
  int buttonStatus = digitalRead(button);

  if (buttonStatus == HIGH) {
    digitalWrite(led, HIGH);
  } else {
    digitalWrite(led, LOW);
  }
}
The important part of this code is if (buttonStatus == HIGH). This means Arduino checks whether the button is being pressed. If the button is pressed, the LED turns on. If not, the LED turns off.
Reading a Light Sensor
A light sensor or LDR can be used to detect bright and dark conditions. Based on the example provided, Arduino reads the light value from pin A0, then turns on the LED if the light value is less than 500.
int lightSensor = A0;
int led = 13;

void setup() {
  pinMode(led, OUTPUT);
  Serial.begin(9600);
}

void loop() {
  int lightValue = analogRead(lightSensor);

  Serial.println(lightValue);

  if (lightValue < 500) {
    digitalWrite(led, HIGH);
  } else {
    digitalWrite(led, LOW);
  }

  delay(500);
}
In the code above, analogRead(lightSensor); is used to read the value from the light sensor. If the value read is less than 500, Arduino considers the condition dark and turns on the LED.
The Function of Serial Monitor in Learning Arduino
Serial Monitor is used to view data from Arduino on a computer screen. In the light sensor example, Serial Monitor is used to display the light value read by the sensor.
Serial.begin(9600);
This code is used to start serial communication.
Serial.println(lightValue);
This code is used to display values on the Serial Monitor. This feature is very helpful during learning because beginners can see sensor data directly and understand how Arduino reads surrounding conditions.
Basic Arduino Coding Concepts
Besides understanding components, beginners also need to know several coding concepts that are often used in Arduino. Important concepts to learn include variables, conditional statements, and loops.
Variables for Storing Data
Variables are used to store data. Based on the information provided, examples of variables in Arduino can be written like this:
int led = 13;
int sensorValue = 0;
Some data types commonly used in Arduino are int for whole numbers, float for decimal numbers, String for text, and bool for true or false values.
If Else for Making Decisions
The if else statement is used when Arduino needs to make a decision based on a certain condition.
if (sensorValue > 500) {
  digitalWrite(led, HIGH);
} else {
  digitalWrite(led, LOW);
}
In this example, if the sensor value is greater than 500, the LED turns on. If the value is not greater than 500, the LED turns off.
Loops for Repeating Commands
Arduino already has a main loop through the loop() function. However, loops can also be created using for.
for (int i = 0; i < 5; i++) {
  digitalWrite(13, HIGH);
  delay(300);
  digitalWrite(13, LOW);
  delay(300);
}
Based on the example provided, this code makes the LED blink 5 times.
Adjusting LED Brightness with PWM
PWM is used to control output not only as ON and OFF, but also as different intensity levels. Based on the information provided, PWM pins usually have a ~ mark, such as pins 3, 5, 6, 9, 10, or 11.
int led = 9;

void setup() {
  pinMode(led, OUTPUT);
}

void loop() {
  analogWrite(led, 50);
  delay(1000);

  analogWrite(led, 150);
  delay(1000);

  analogWrite(led, 255);
  delay(1000);
}
PWM values range from 0 to 255. A value of 0 means off, while 255 means the brightest level. With this method, the LED can be made dimmer or brighter according to the given value.
Learning Path for Arduino Beginners
To make the learning process more organized, beginners can follow the learning path provided. Start by getting to know Arduino and Arduino IDE, turning on an LED, making an LED blink, reading a button, reading an analog sensor, using Serial Monitor, using a buzzer, adjusting LED brightness with PWM, using a servo, then creating a mini project.
Some mini projects to try include an automatic light with LDR, a door alarm with a buzzer, an automatic trash bin with a distance sensor, an automatic fan based on temperature, and a mini traffic light.
Tips for Learning Arduino More Effectively
Start with small projects such as blinking an LED, reading a button, and reading a light sensor. Based on the information provided, beginners should not jump straight into projects that are too complex, such as robots or IoT, before understanding the basics of input, output, variables, and if else logic.
Use the Serial Monitor to check sensor values. Also, pay attention to cable placement, pins, resistors, and component polarity. For LEDs, use a resistor so the LED does not get damaged easily.
Another important point is not to connect high-current components directly to Arduino pins. For components such as motors, pumps, or AC lamps, use additional modules such as relays or motor drivers.
Frequently Asked Questions
What should beginners learn first in Arduino?
Start by learning Arduino IDE, understanding the setup() and loop() structure, then trying the blinking LED program.
Why is Arduino Uno suitable for beginners?
Arduino Uno is suitable for beginners because, based on the information provided, this board is commonly used, has many tutorials, code examples, and components that are easy to find in Indonesia.
What is the function of Serial Monitor in Arduino?
Serial Monitor is used to view data from Arduino on a computer screen, such as light sensor values read through an analog pin.
Conclusion
Learning Arduino coding helps beginners understand the connection between code and electronic devices. By understanding setup(), loop(), pinMode(), digitalWrite(), digitalRead(), analogRead(), analogWrite(), and if else, beginners can start creating basic projects such as blinking LEDs, automatic lights, and door alarms.
If you want to learn coding, creative technology, and other digital topics with more structured guidance, you can learn with us at Koding Akademi through https://www.kodingakademi.id/.